I have been using my brothers Guild Pilot bass for a couple of years and have gotten some good mileage out of it.
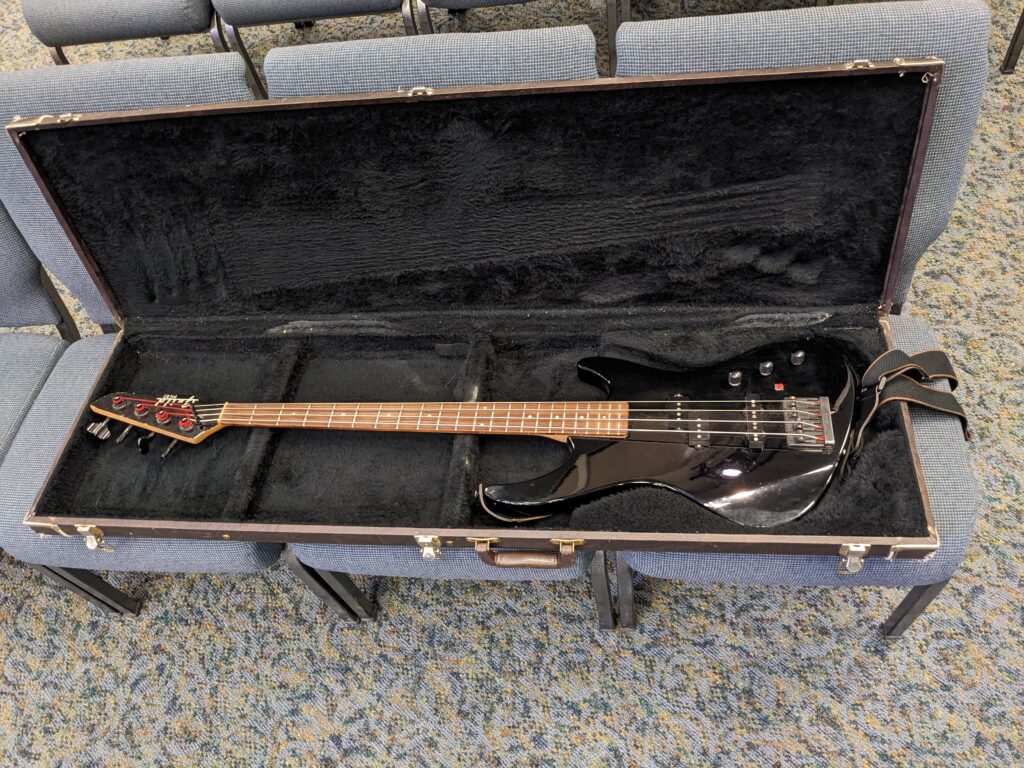
Last Thursday while practicing, I tried playing a G on the E string and I got a dead note. I confirmed that no cords or clothing was deadening the strings, but nothing changed. It looked like the string was hitting the 4th fret so bad it didn’t buzz, it just killed the note. But when I pushed my thumb on the back of the neck I started to get some sound back. So I did what any reasonable musician would do and pulled the top of the headstock forward with about 10 pounds of pressure.
I heard a ‘snap’!
then all my notes where flat. I tuned it up again and played some clean notes, but soon I got dead notes again. When practice was done, I looked more closely, and the headstock could be wiggled compared to the rest of the guitar. Sorry, brother.
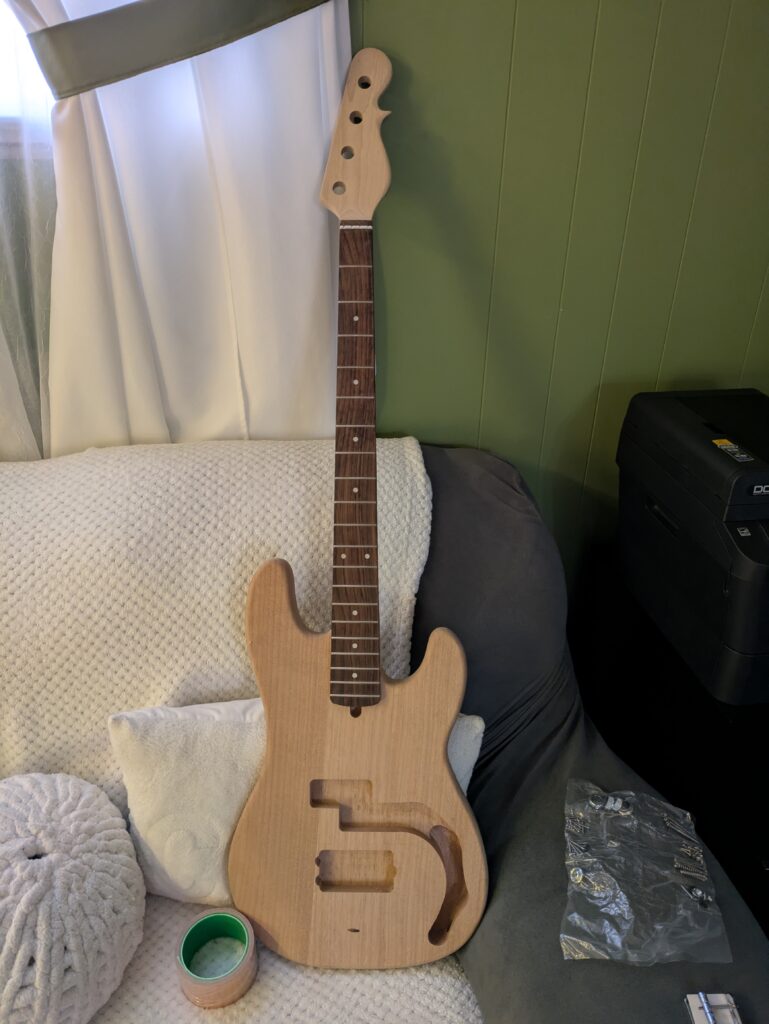
I have had a bass kit on my project shelf for a few years now. I had grand aspirations for it that kept me from building it. Visions of epoxy inlays, sanding, painting, sanding, airbrushing, sanding and sanding swam through my head every time I looked at it.
But now I had to build it or I would let my teammates down. I had Saturday available to me.
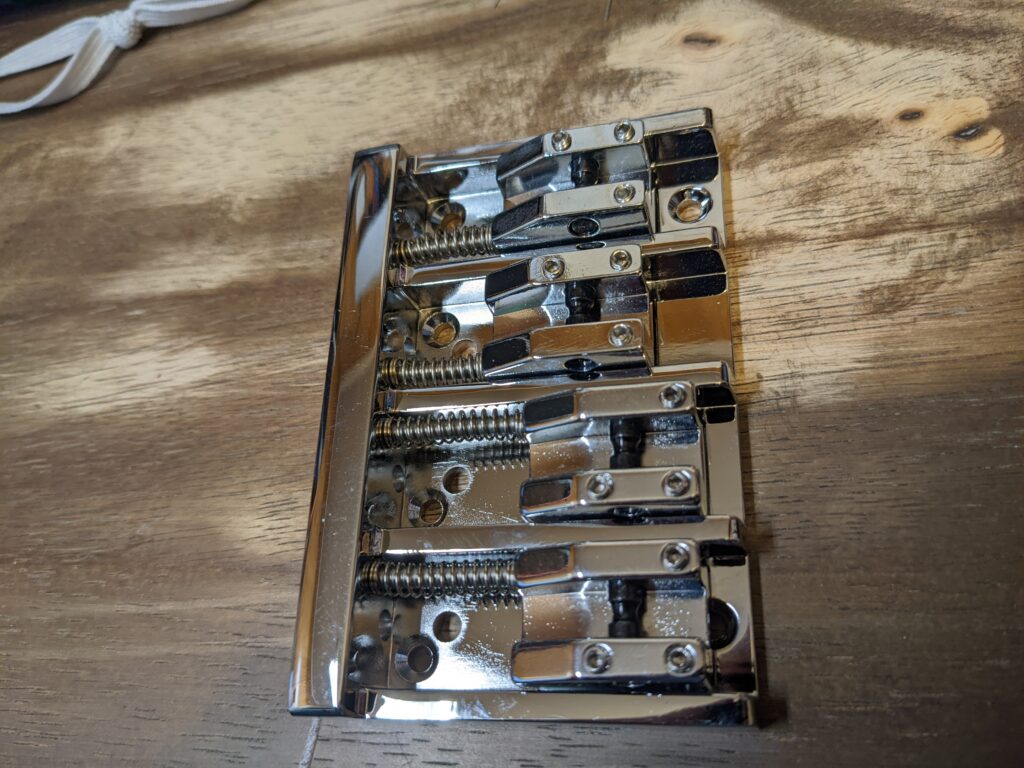
It was a cheap ~$100 kit from Amazon. At advice from Wayne Evenson I got brass inserts for the neck, and Ben King convinced me to upgrade the bridge. I also had tuners but had organized those into oblivion some time ago.
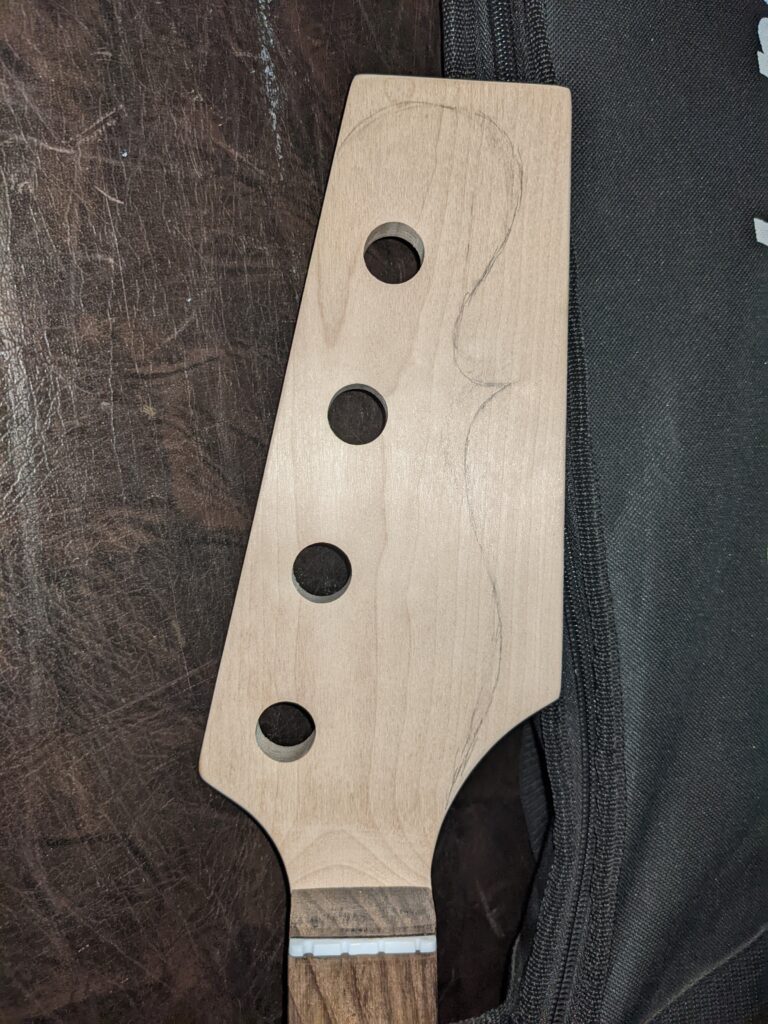
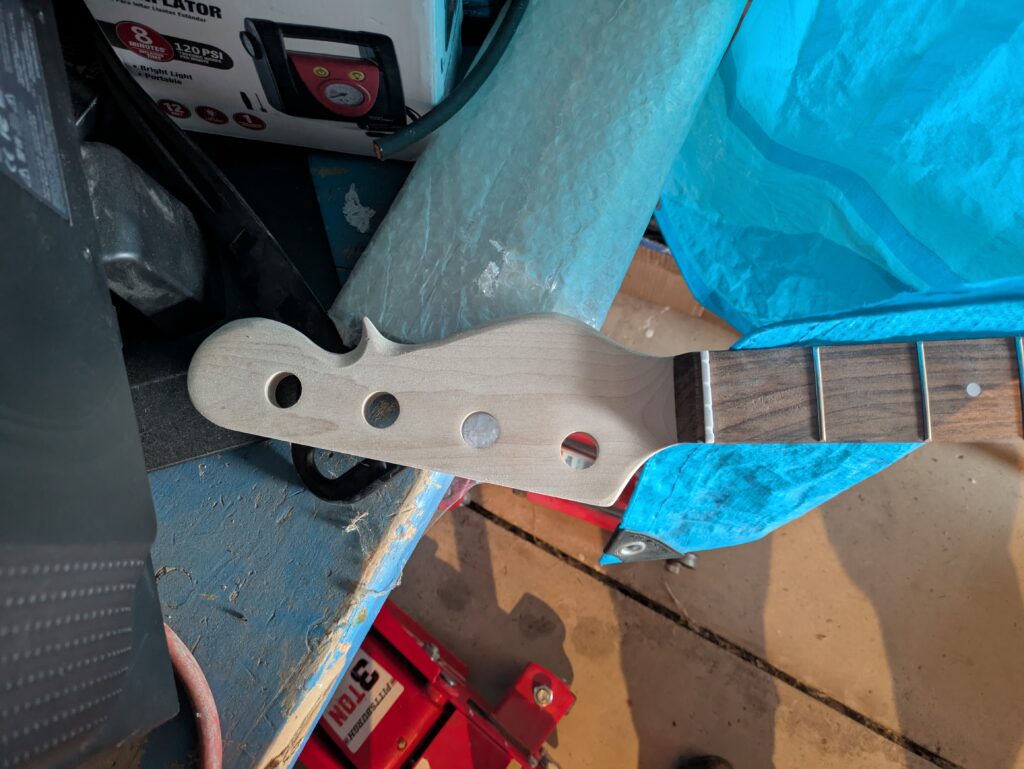
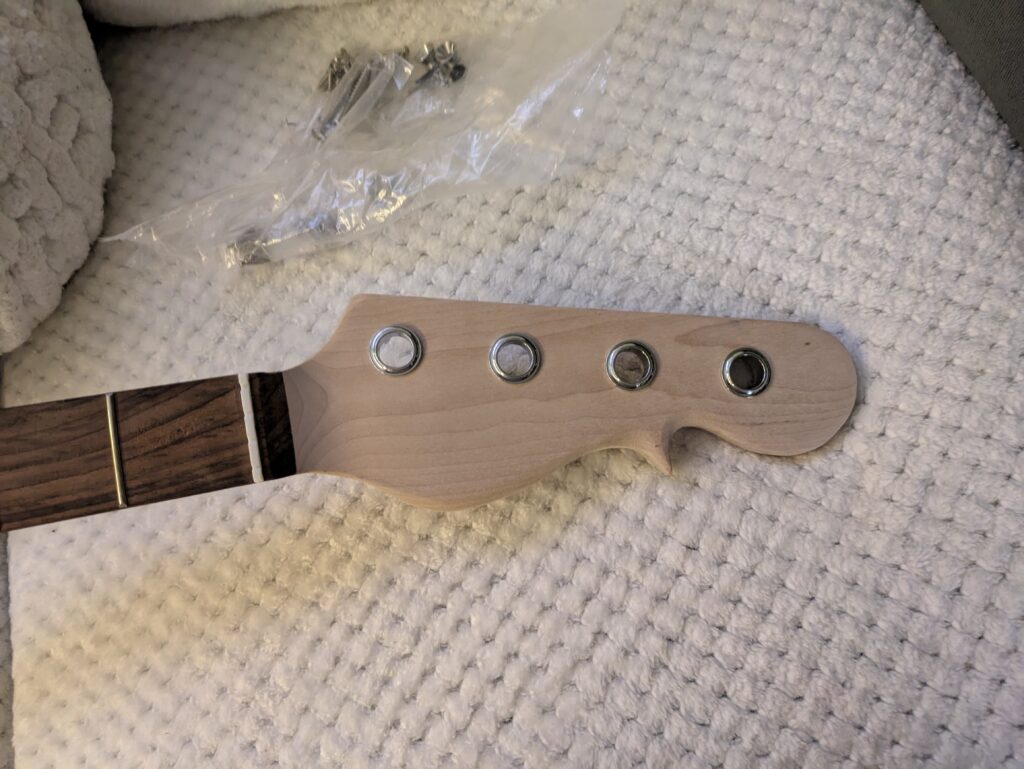
I was always a fan of the Music Man version of headstock that Jess Coss has on her guitar, so I cut and sanded:
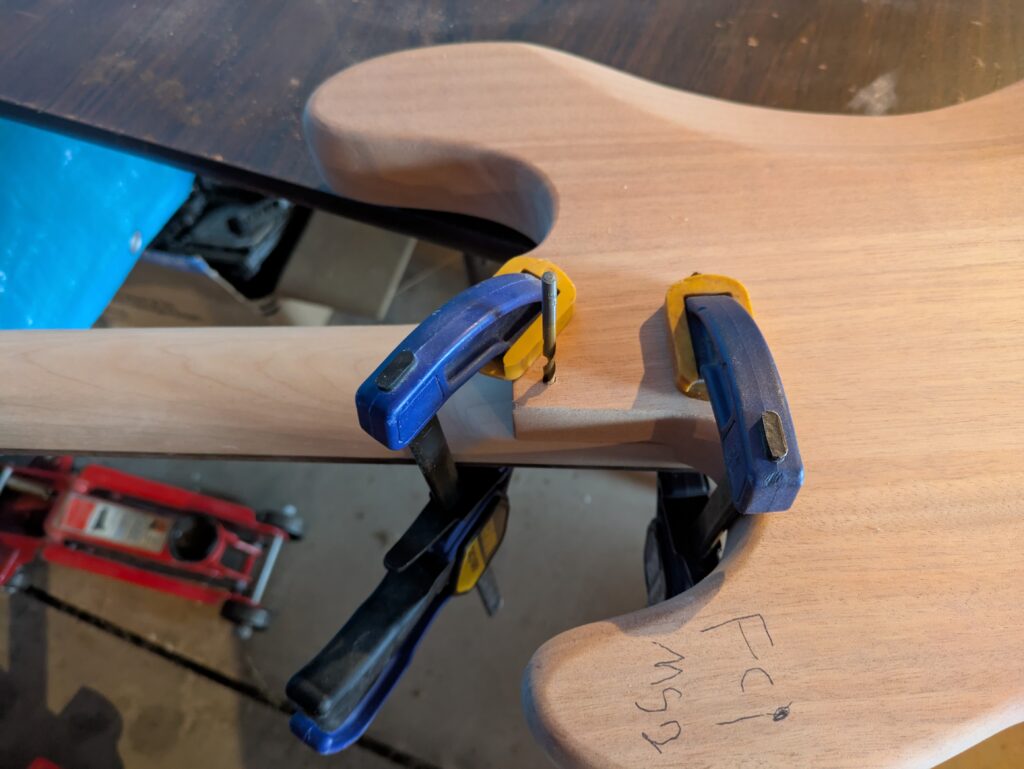
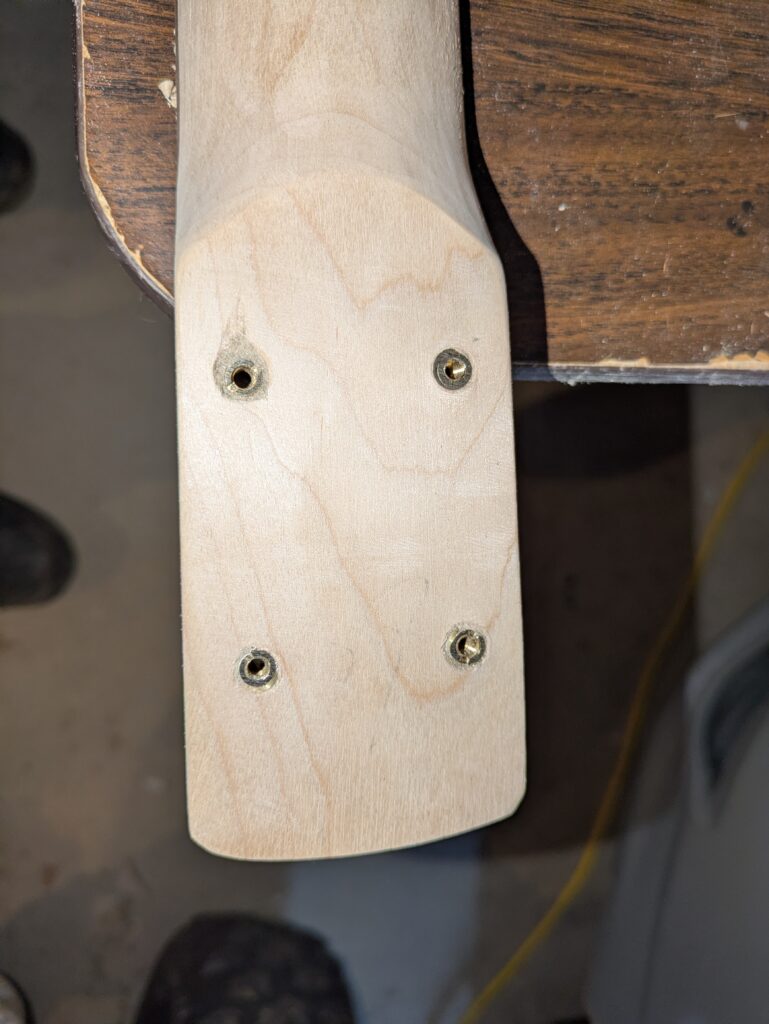
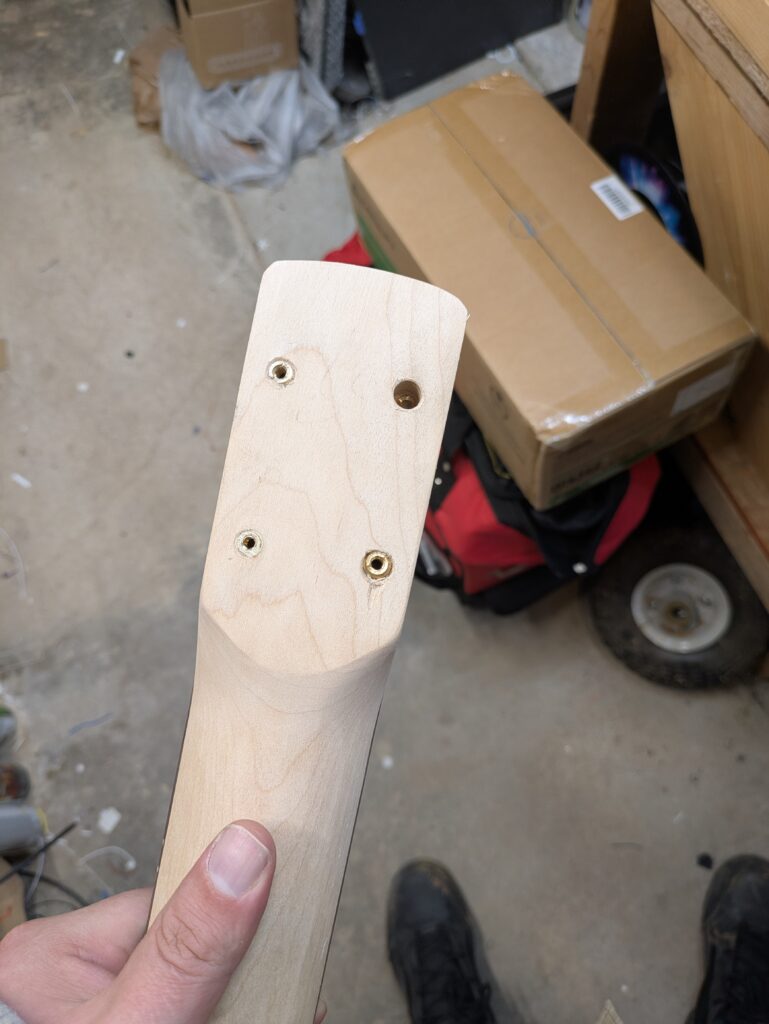
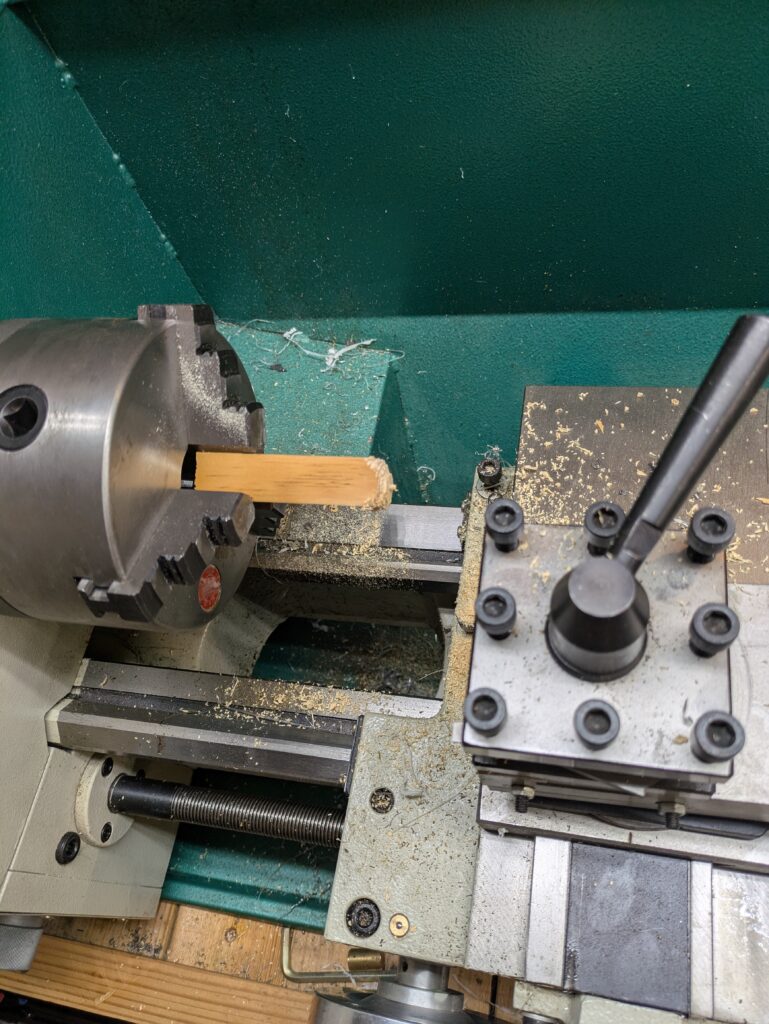
Then I marked the neck for the inserts and used a milling machine to drill holes:
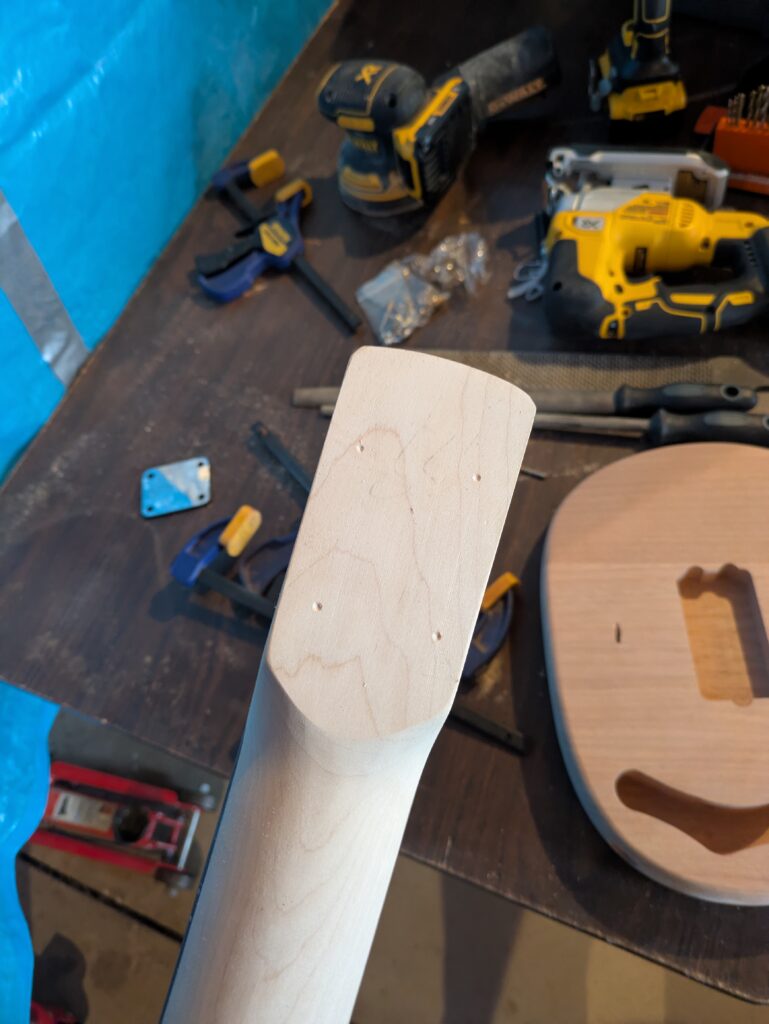

The inserts have a slot for a standard screwdriver. After the job was done, I discovered a hex screw is the right way to install these. The top kept shearing once they were really in there, even with the ideal screwdriver. I had to file the tops flat.
The force I used to get these in also messed me up. Next time I will use a hex screw and bit in the milling machine to get these in place.
Oof.
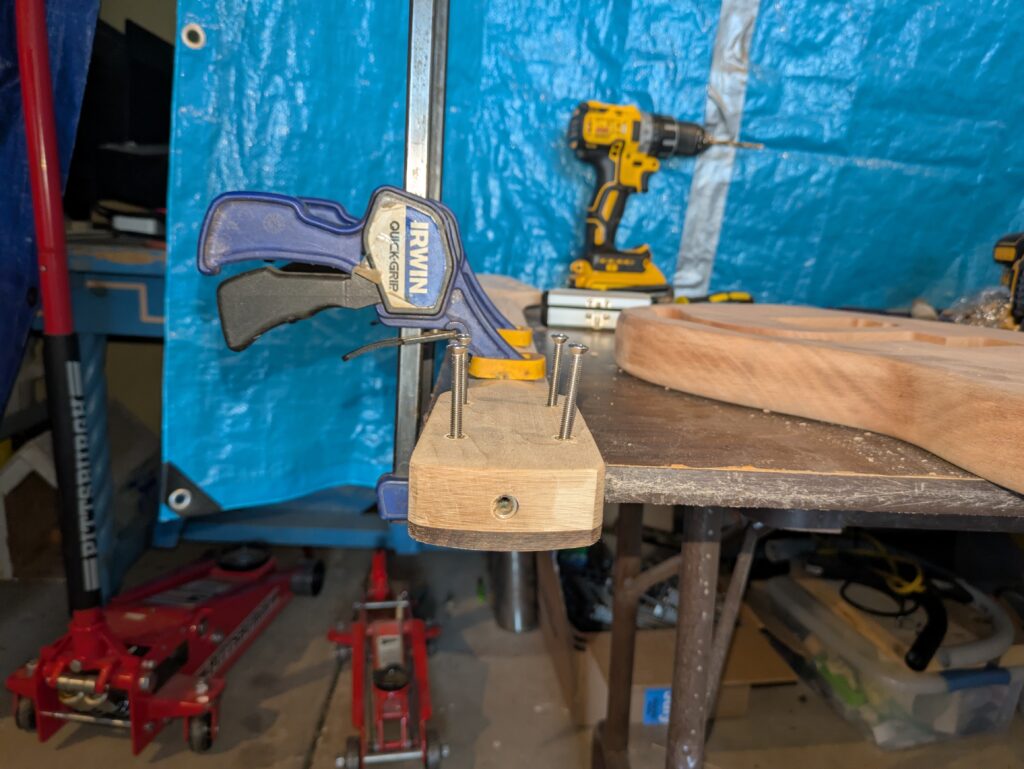
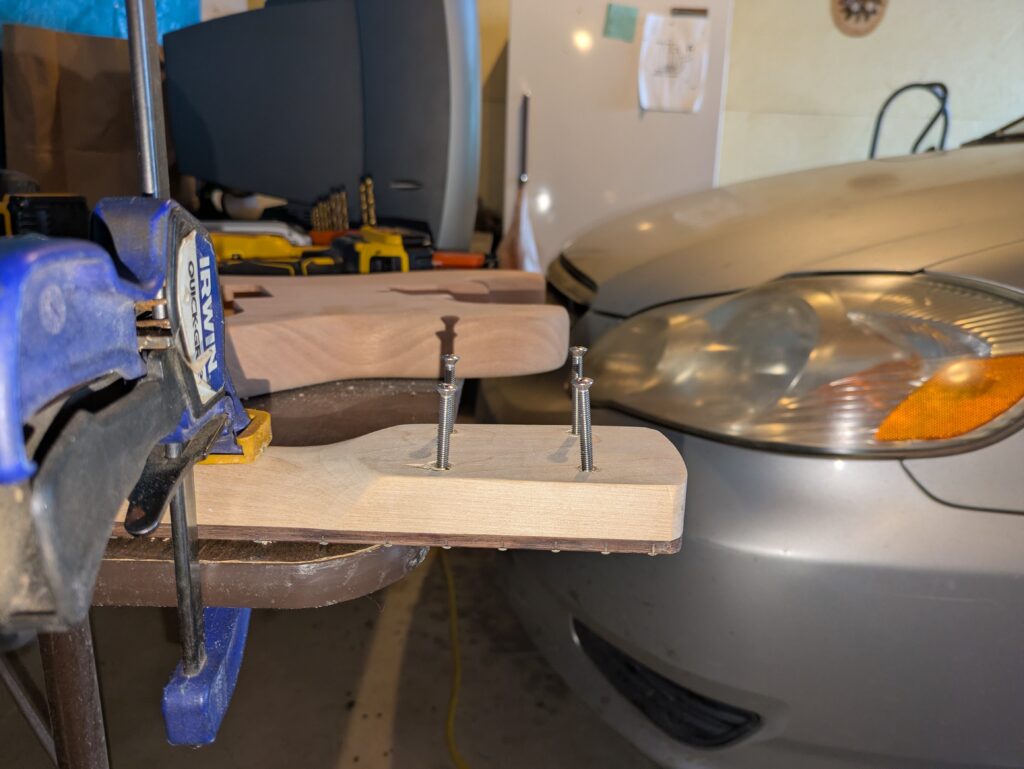
Well that was easy enough. Now for a dowel.
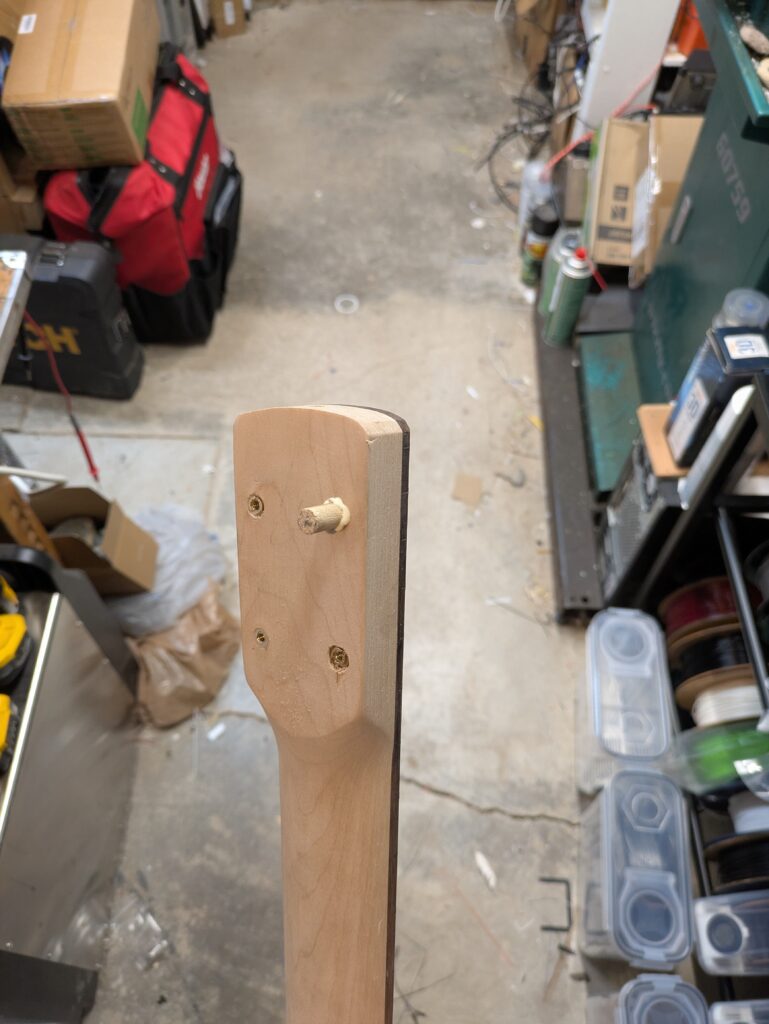
Ah good as new. I have no idea what kind of wood it was. in hindsight I could have used material from the headstock. Oh well I’m sure that wont come back to haunt me.
For the odd one out I used the included wood screw.
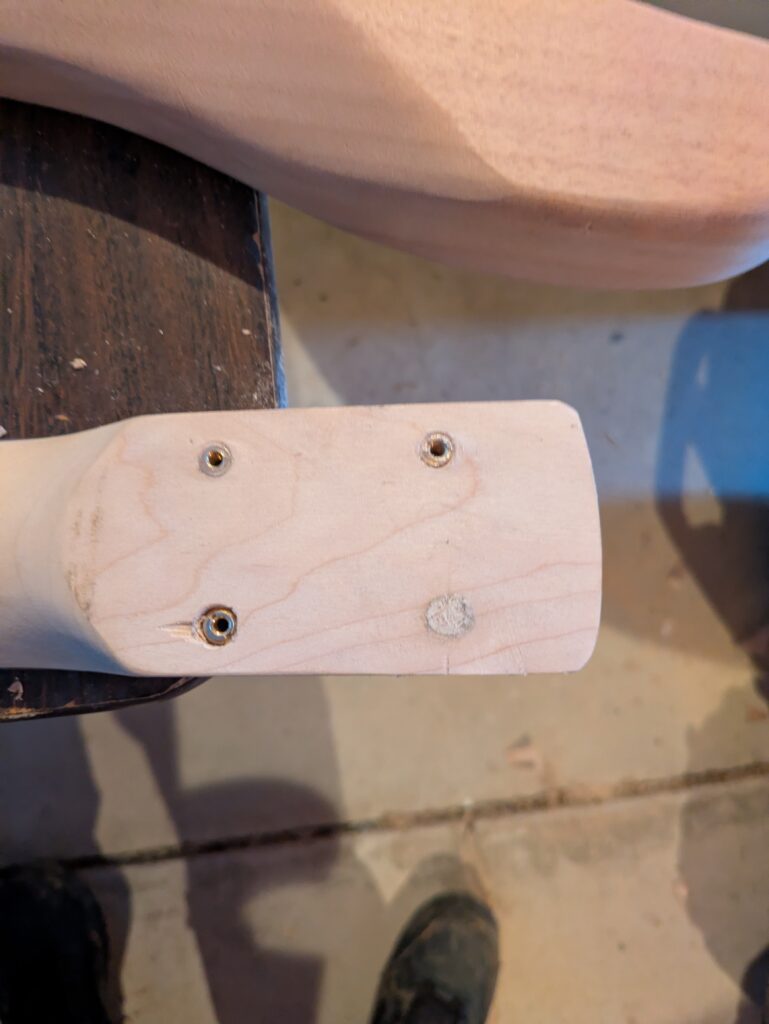
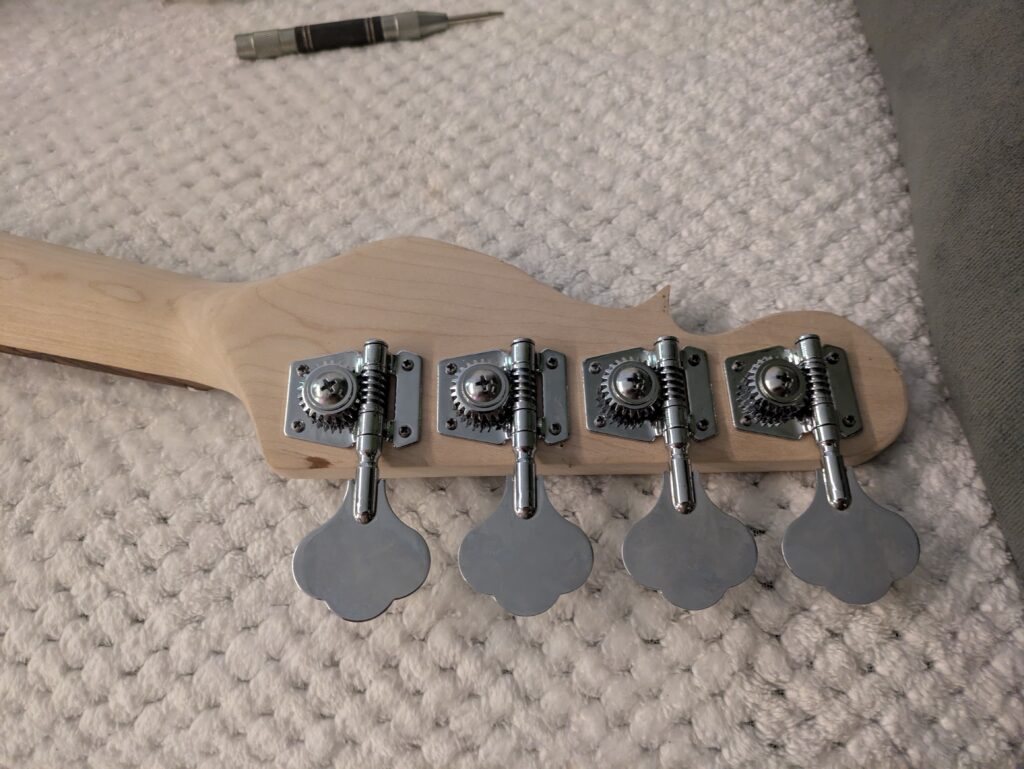
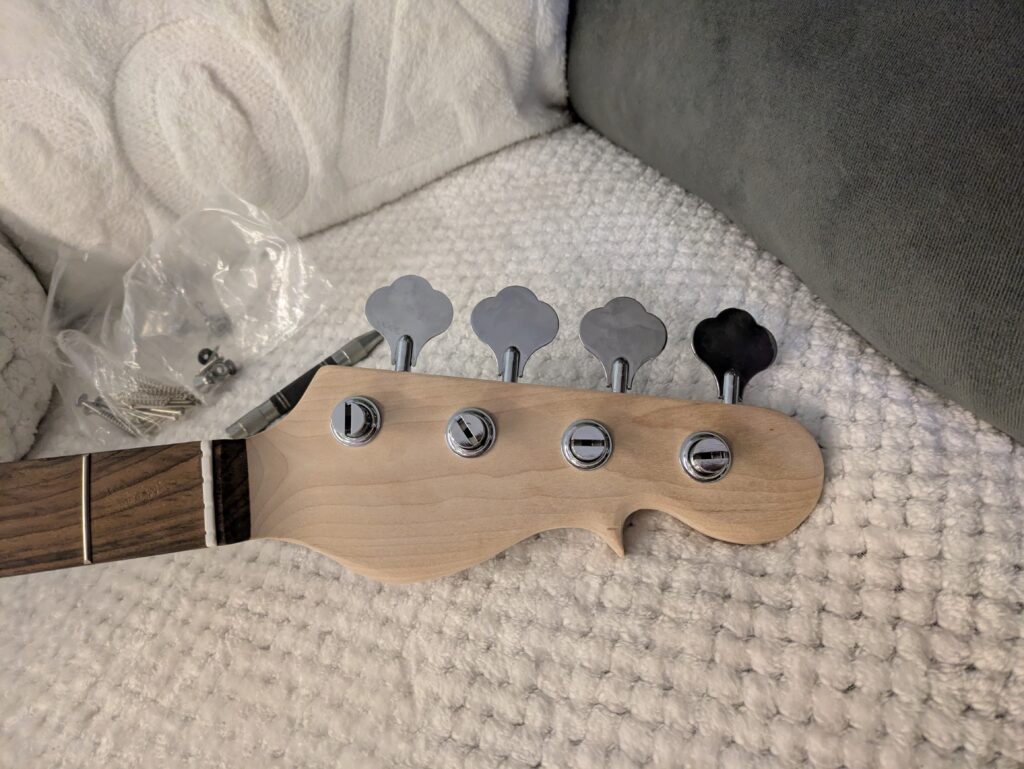
Now for the tuners. These fit snugly with no tools.
I used a center punch to mark out the tuners by eye. The wood didn’t seem to need pilot holes, and my available drills were too big for these screws in any case.

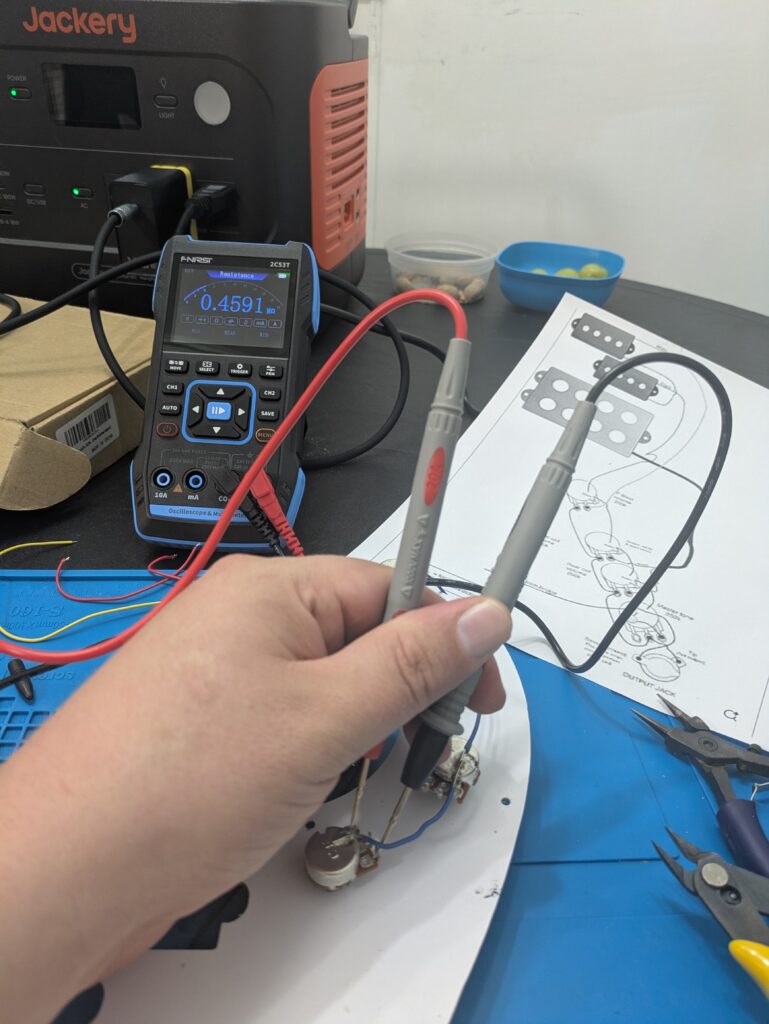
Electronics time! This is the area I can do well in.
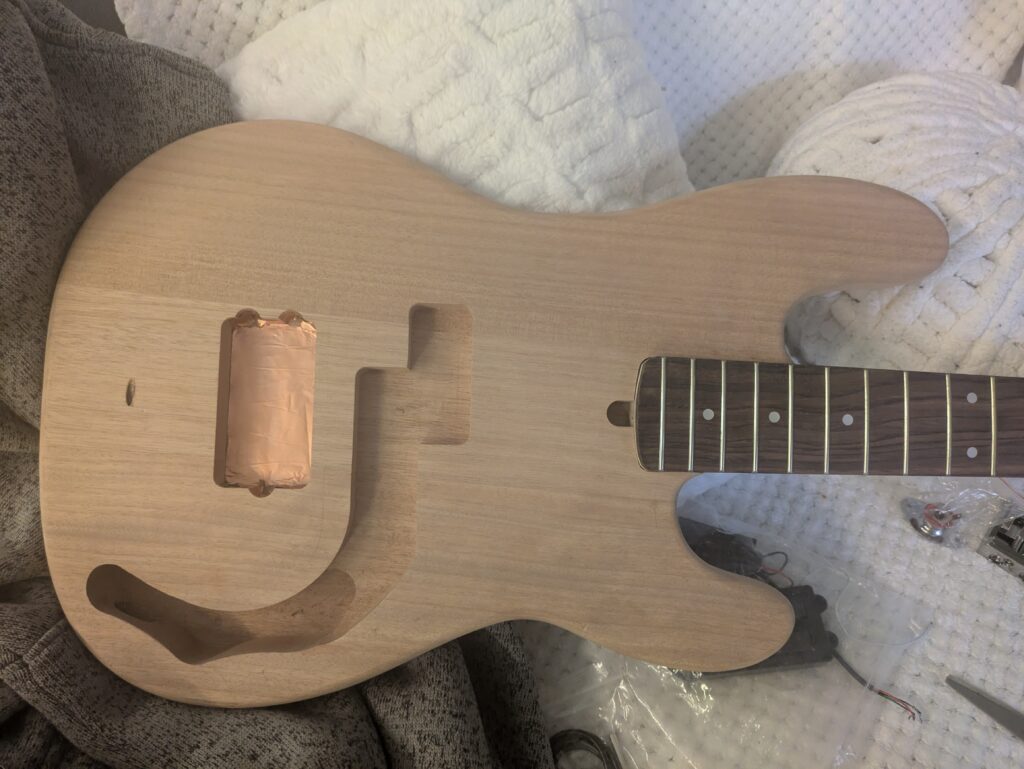
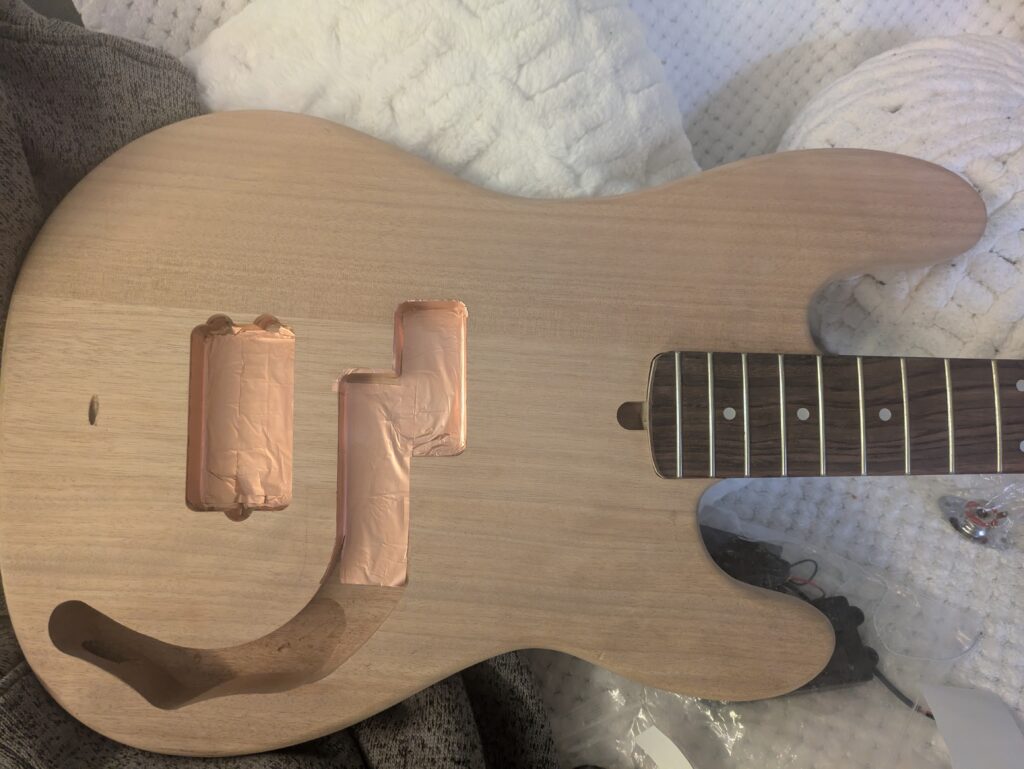
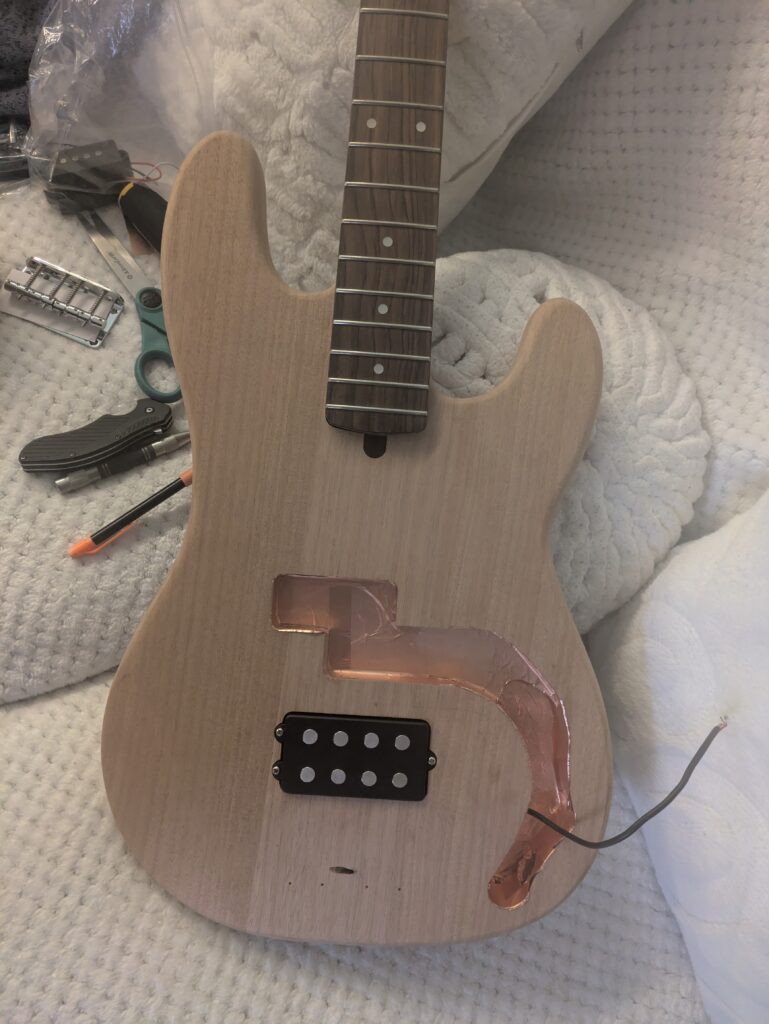
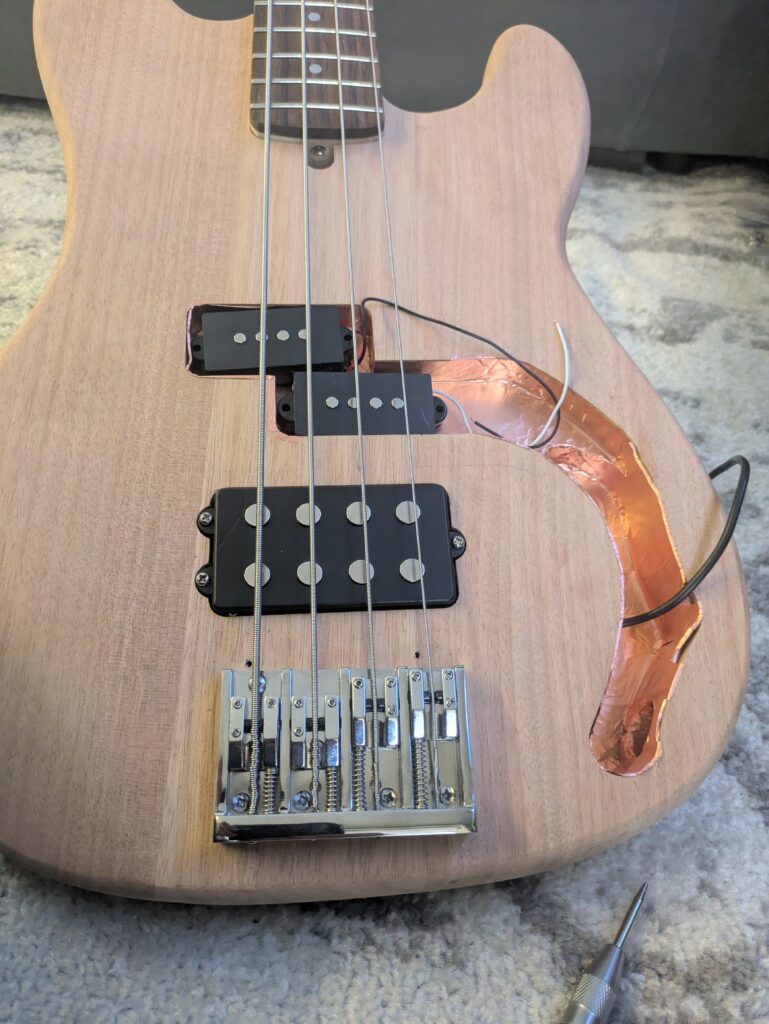
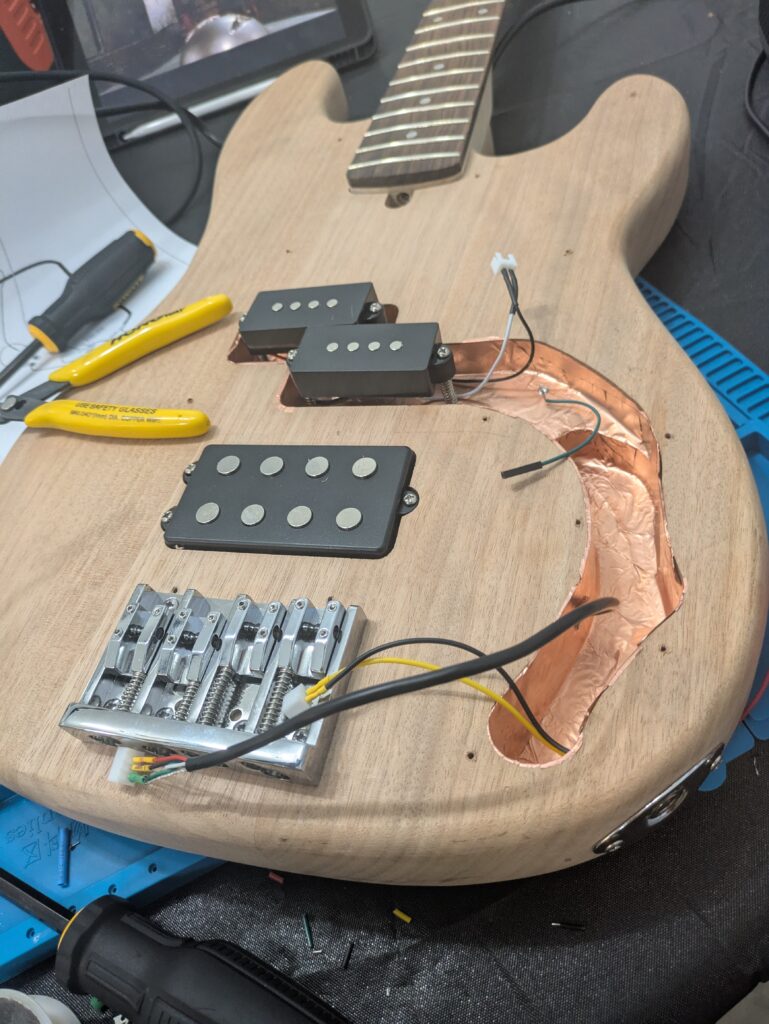
That is Copper tape, made for the purpose of creating a shielded cavity.
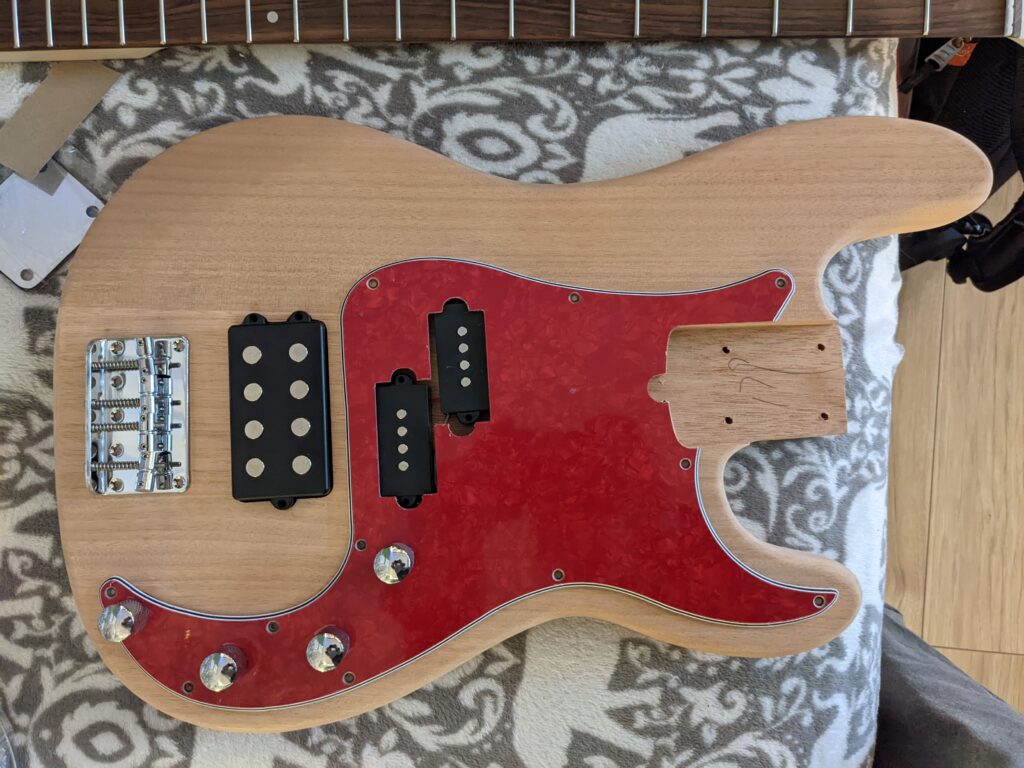
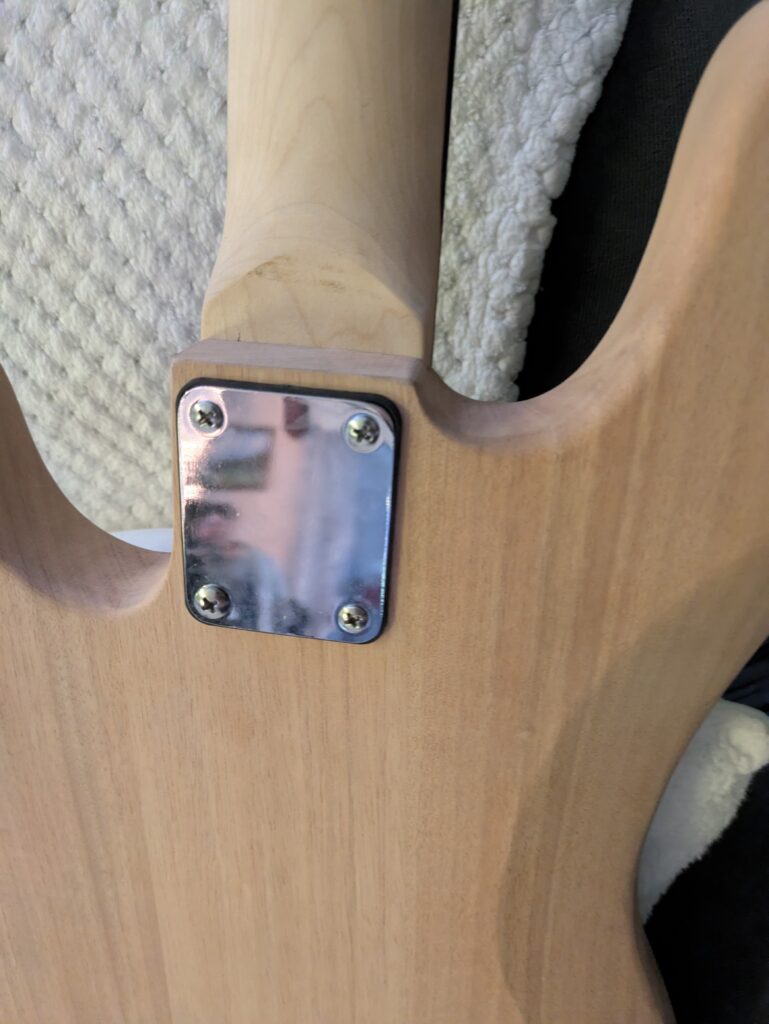
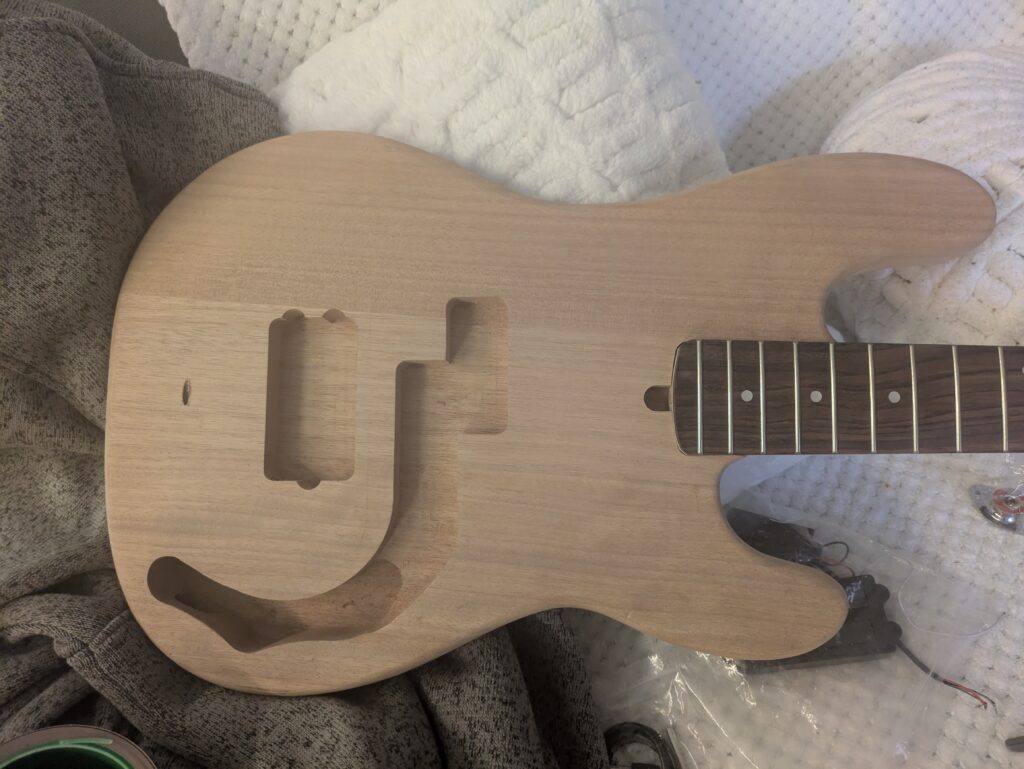
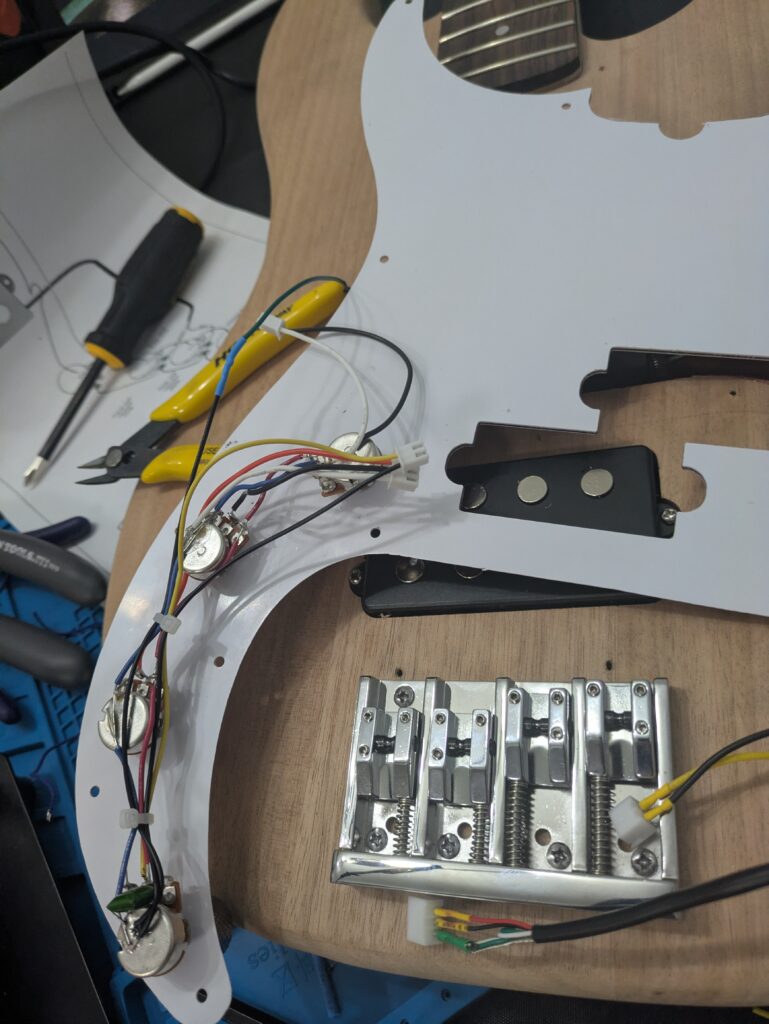
Next I installed the humbucker to make place the bridge. I measured from the nut to the 12th fret, and that distance again to where I thought the saddle part of the bridge needs to go. I used the included E and G strings to line up the bridge to the neck and the pickup.
Uh, ignore the extra holes. Attempt 2: since the D and G string saddles cannot go as low as the E and A.
No wiring diagram. No indication of where things need to go. Here is how it came:
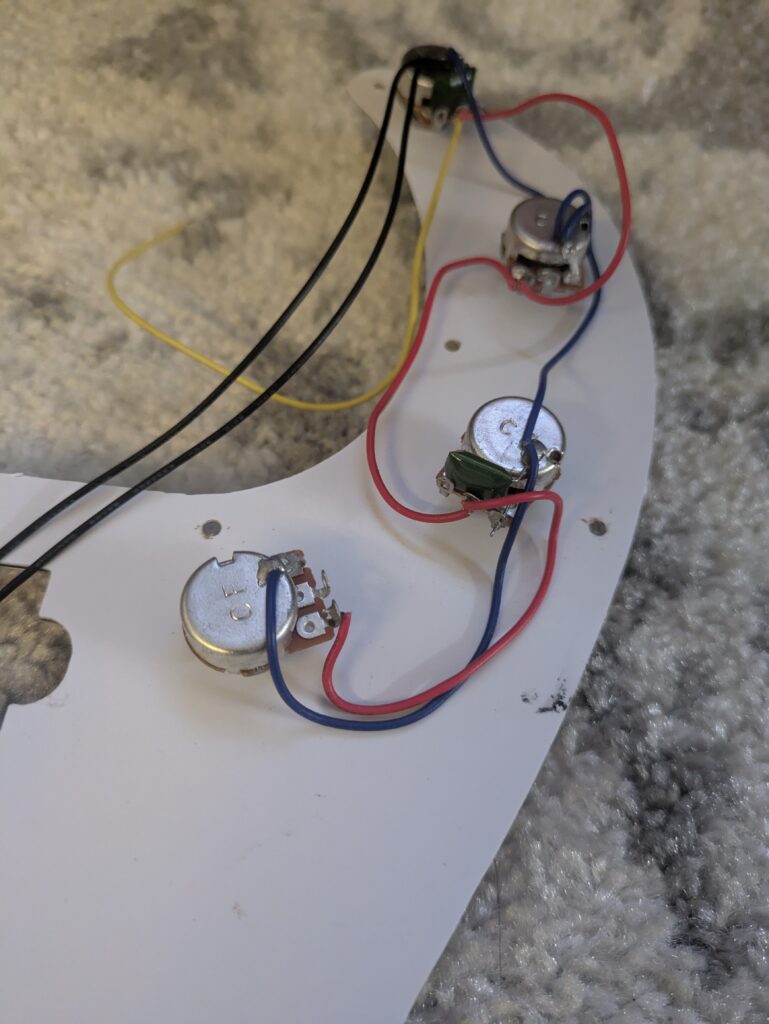
Green and white soldered together on the humbucker. Fair enough. But black and shielded? Also 2 tone knobs? In a passive setup, these fight each other. Better start over. I found a diagram on Pintrest that was close to what I wanted.
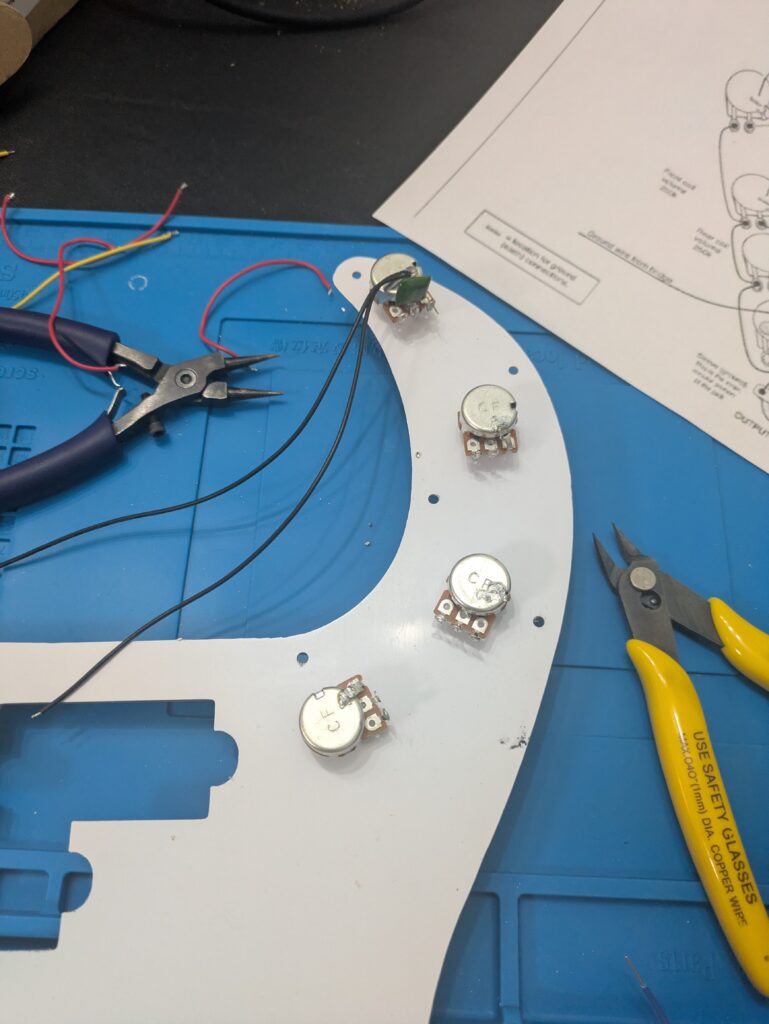
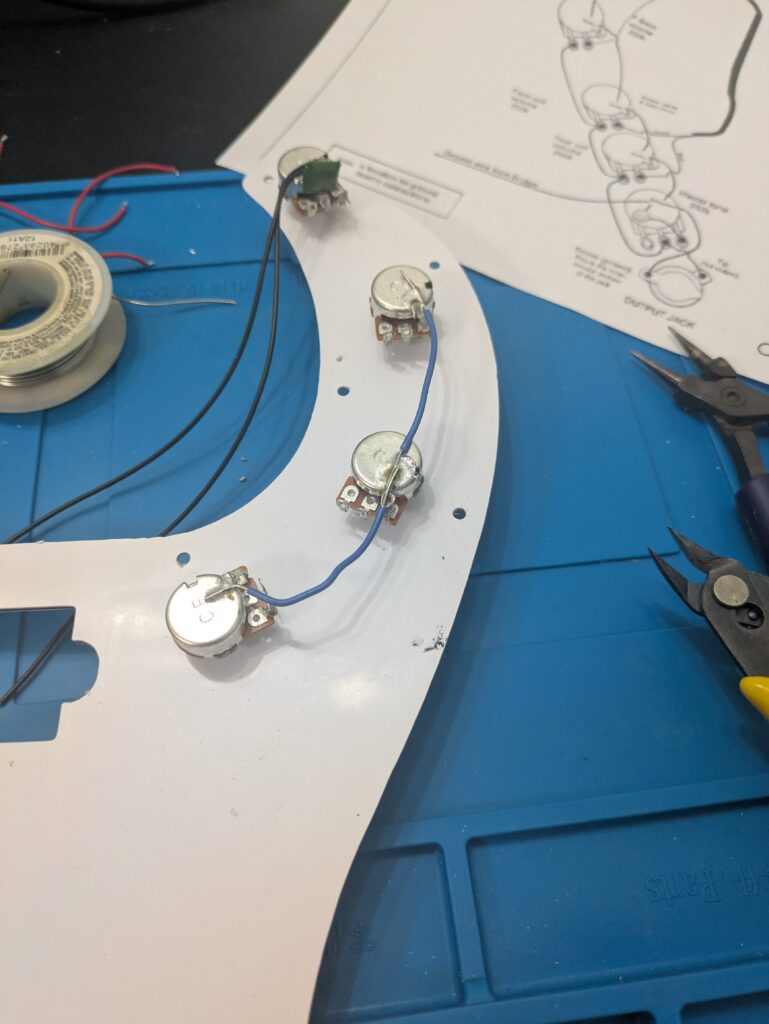
Ahh, much better. Wait 500K?!
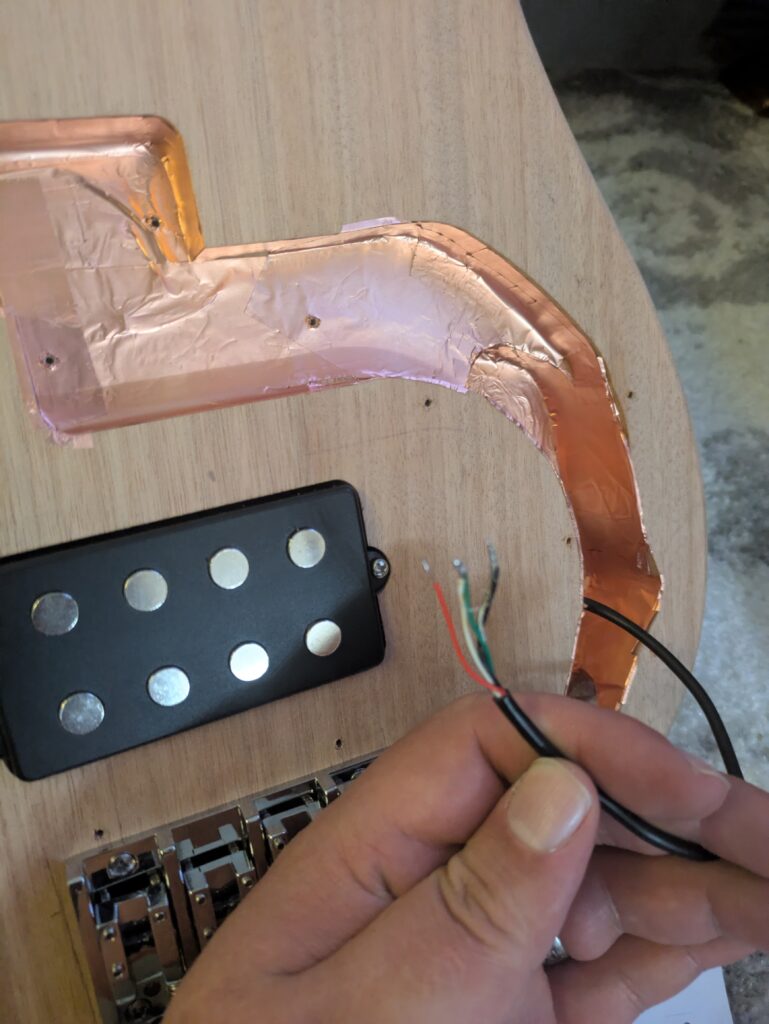
Now for some JST connectors. I hate taking something apart and being unable to detach without tools.
See the green wire soldered to the tape? Probably my favorite part.
Also I did the bridge one more time.
Then for a test! The included strings really suck! But it was all there electrically, although the tone knob is very non linear. Time for better strings:
B round wound; E, A and D flat neon wound. Nice!
It is 4 AM and I am going to bed.
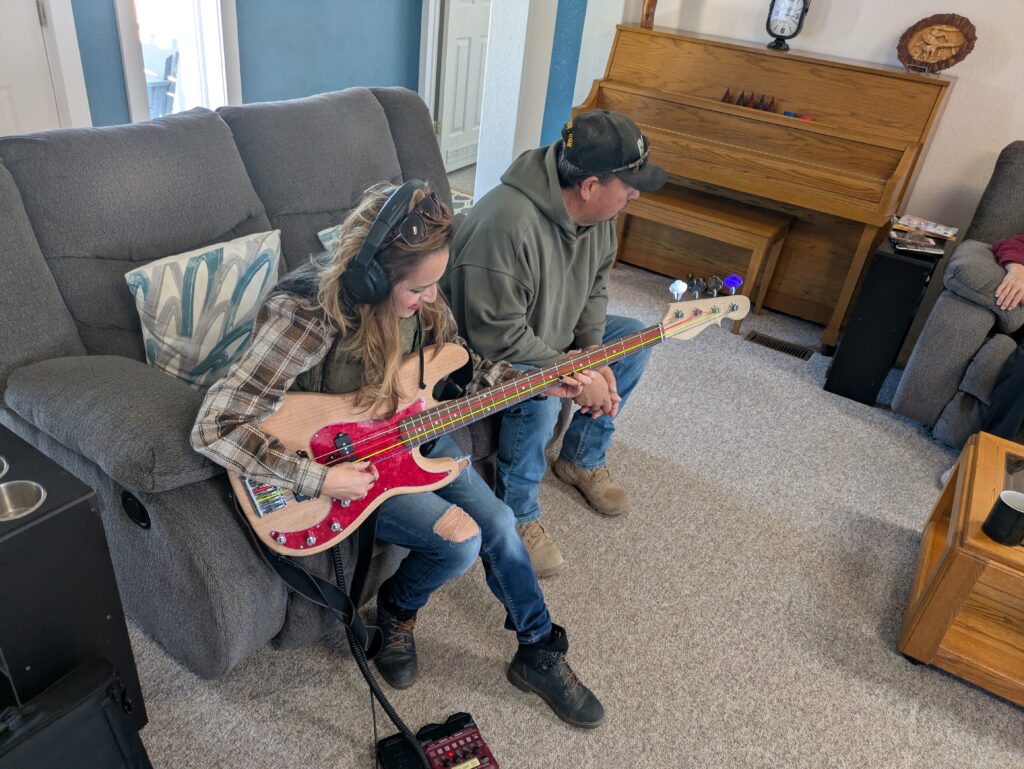
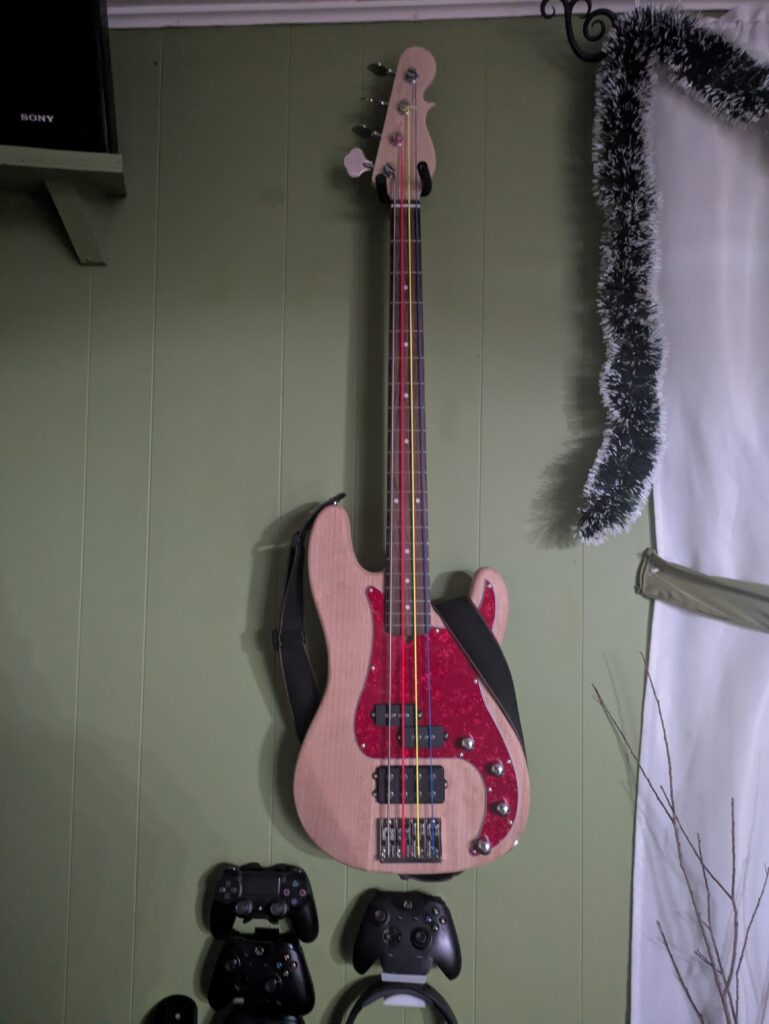
The next day it played very well. The sustain is very high compared to the old Guild Pilot even on its better days. The action feels good to play. The humbucker is boinky, and the split has a great full tone. The A and D are a bit quiet compared to the B and E strings, so I am hoping bringing the bottom split pickup closer will work. The fretboard and really all of the wood surface needs finishing, but I do want to do some lasering first. There is also fretwork and lots of sanding to do.
The process has been rewarding but I know I am no luthier. I have crooked screws all over the place, and it took an emergency for me to start. Next time, I will use my toolbox for 3D scanning and printing jigs to get it perfect. At least, I plan to.
Angelina helped me test.